Mbsm.tn, How to Choose the Right Compressor for Your Refrigeration Needs
Category: Machine Learning
written by Mbsm.tn | 20 December، 2024
Selecting the appropriate compressor for your refrigeration system is essential for maximizing efficiency, performance, and longevity. This guide outlines the key factors to consider, enabling you to make an informed choice tailored to your specific requirements.
1. Assess Your Refrigeration Requirements
Load Requirements: Start by determining the cooling load necessary for your application. Calculate the required capacity based on the size of the space and the type of products stored. For instance, perishable items like meat require lower temperatures than fruits and vegetables.Temperature Range: Identify the specific temperature range needed for your products. Different items have varying sensitivities to temperature changes, so select a compressor that can maintain consistent conditions.
2. Calculate Compressor Capacity
Capacity Measurement: Compressor capacity is measured in BTUs (British Thermal Units) or horsepower (HP). To determine the required capacity, consider:
Space Volume: Measure the length, width, and height of the area to find its cubic footage.
Insulation Quality: Better insulation reduces the load on the compressor, potentially allowing for a smaller unit.
Compressor Types: Understand the different types of compressors available:
Single-stage Compressors: Suitable for applications that consistently operate at full load.
Multi-stage Compressors: Ideal for heavy-duty tasks requiring higher efficiency and better compression ratios.
3. Evaluate Efficiency and Performance
Energy Efficiency Ratings: Look for compressors with high energy efficiency ratings. A more efficient motor helps reduce operating costs and energy consumption over time.Starting Torque Requirements: Consider starting torque needs based on your system design. Compressors with low starting torque (LST) work well with capillary tubes, while those needing high starting torque (HST) are better suited for systems with non-equalized pressures.
4. Consider Environmental Impact
With growing environmental regulations, opt for compressors compatible with eco-friendly refrigerants such as R290 or R600A. These refrigerants not only minimize environmental impact but also enhance overall energy efficiency.
5. Review Manufacturer Specifications
Consult manufacturer specifications and selection tools to ensure you choose a compressor that aligns with your needs. Many manufacturers provide charts and software to assist in selecting compressors based on refrigerant type, suction line temperature, and condensing temperature.
6. Seek Professional Advice
If you’re uncertain about your selection or need help sizing a compressor, consult refrigeration professionals or engineers who can provide expert guidance based on their experience.
Conclusion
Choosing the right compressor is critical for optimizing your refrigeration system’s performance and efficiency. By carefully assessing your requirements, calculating capacity, evaluating energy efficiency, considering environmental impact, and consulting professionals when needed, you can select a compressor that meets your operational demands while contributing to sustainability. This revised guide emphasizes clarity and effectiveness while maintaining essential information for readers seeking to optimize their refrigeration systems.
Mbsm.tn, Discover, Perplexity, AI, The Better, AI, for Your Information Needs
Category: Big Data
written by Mbsm.tn | 20 December، 2024
Discover Perplexity AI: The Better AI for Your Information Needs
Perplexity AI is a versatile and powerful tool that allows users to access information in a conversational manner, making it easy to find answers to a wide range of queries. With its unique features and user-friendly interface, it stands out as one of the best AI options available today. Here’s an overview of its capabilities, emphasizing that it is free, can be utilized with any language, and serves as an excellent resource for teaching and learning.
Key Features of Perplexity AI
Free Access: Perplexity AI offers a robust free version that allows users to perform unlimited basic searches and up to 5 Pro searches per day. This makes it accessible for casual users, students, and educators looking to explore AI capabilities without financial commitment.
Natural Language Processing: Users can interact with Perplexity AI using natural language, which means you can ask questions just as you would in conversation. This feature enhances the user experience by making searches more intuitive and straightforward.
Multilingual Support: Perplexity AI can be used with any language, allowing users from diverse linguistic backgrounds to access information relevant to their queries. This inclusivity broadens its usability across different regions and cultures, making it a truly global tool.
Follow-up Questions: The platform allows for follow-up questions, enabling users to delve deeper into topics without having to rephrase their initial inquiries. This conversational approach facilitates a more engaging search experience, setting it apart from other AI tools.
Citations and References: Unlike many other AI platforms, Perplexity provides citations for the information it presents. This feature is particularly useful for fact-checking and verifying sources, enhancing the reliability of the answers provided.
Why Perplexity AI is the Better Choice
User-Centric Design: Perplexity prioritizes user experience with its intuitive interface and natural language capabilities, making information retrieval seamless and efficient.
Comprehensive Answers: The ability to ask follow-up questions means users can obtain more detailed responses, allowing for deeper understanding and exploration of topics—ideal for both teaching and learning.
Accessibility: With free access and support for multiple languages, Perplexity AI democratizes information access, ensuring that everyone can benefit from its advanced capabilities.
Educational Resource: For teachers and students alike, Perplexity AI serves as an invaluable educational tool. It can assist in lesson planning, provide explanations of complex concepts, and support research efforts across various subjects.
Pro Features: For those who want even more functionality, the Pro version offers additional features like document uploads and enhanced search capabilities, further solidifying its position as the better AI option.
How to Use Perplexity AI for Free
Create an Account (Optional): While you can use Perplexity without an account, signing up allows you to save your search history and customize your experience. The process is straightforward and quick.
Start Searching: Simply type your question into the search bar. You can ask about any topic—academic subjects, practical skills, or general knowledge—and Perplexity will generate responses based on extensive data sources.
Utilize Follow-up Questions: After receiving an answer, feel free to ask follow-up questions to gain more insights or clarify details. Remember, you have a daily limit of 5 Pro searches which refreshes every four hours.
Explore Different Topics: Use Perplexity for various purposes such as research projects, homework help, or even casual inquiries about current events or general knowledge.
Leverage Multimodal Capabilities (Pro Version): If you opt for the Pro version later on, you can upload documents and images for analysis, enhancing your search capabilities further.
Conclusion
Perplexity AI stands out as the better choice among AI tools due to its advanced technology combined with user-friendly features. It provides a free resource where you can ask questions in any language and receive accurate, real-time answers tailored to your needs. Whether you are a student seeking help with homework or a teacher looking for resources to enhance your lessons, Perplexity AI empowers you with the information you seek in an engaging and accessible way. Feel free to modify any part of this post according to your preferences!
Mbsm.tn, Plugins wordpress 2025, add a table of all attachement and link of post in end of article, by Mbsmgroup
Category: Machine Learning
written by Mbsm.tn | 20 December، 2024
Article: Enhance Your WordPress Posts with the Attachments Table Plugin
In today’s digital world, organizing content effectively is crucial for improving user engagement and accessibility. Whether you’re running a blog, an educational platform, or a business website, ensuring that your users can easily access attachments, images, and links within your posts is essential. The Attachments Table Plugin is here to help!
What is the Attachments Table Plugin?
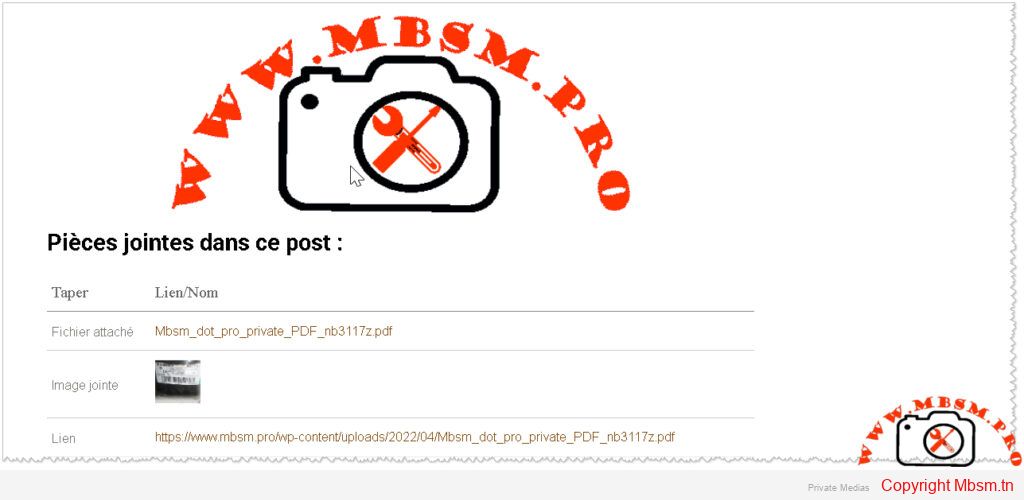
The Attachments Table Plugin is a custom WordPress plugin designed to automatically display all attachments (images, files) and links found within a post in a neatly organized table at the bottom of the page. This plugin simplifies the process of managing and showcasing downloadable files, embedded images, and external links, making it easier for users to interact with your content.
Why Use the Attachments Table Plugin?
Improved Accessibility : By listing all attachments and links in one place, users no longer need to search through the entire post to find what they’re looking for.
Enhanced User Experience : A clean and organized table improves readability and usability, encouraging users to engage more with your content.
SEO Benefits : The plugin dynamically adds SEO meta tags (title and description) to each post, helping improve search engine rankings.
Multilingual Support : With built-in localization capabilities, the plugin supports multiple languages, making it ideal for global audiences.
Customizable Design : The plugin includes responsive CSS to ensure the logo and table look great on all devices, from desktops to mobile phones.
How Does It Work?
Once activated, the plugin hooks into the the_content filter in WordPress and appends an attachments table to the bottom of single post pages. Here’s how it works:
Retrieve Attached Media : The plugin fetches all media files (e.g., PDFs, documents, images) uploaded directly to the post.
Extract Embedded Images : Using regular expressions, the plugin identifies and lists all images embedded within the post content.
Find Links : The plugin scans the post for all <a> tags and displays them as clickable links in the table.
Display the Table : A neatly formatted table is generated, categorizing items into “Type” (e.g., Image Attachment, Attached File, Link) and “Link/Name.”
If no attachments or links are found, the plugin displays a friendly message indicating this.
Key Features
Attachments Table : Automatically generates a table containing all attachments and links.
Dynamic SEO Meta Tags : Adds title and description meta tags to improve SEO performance.
Responsive Design : Ensures the table and logo look great on all devices, including mobile phones.
Translatable Text : Supports multilingual websites using WordPress localization functions.
Logo Integration : Displays your company logo above the table, enhancing branding.
How to Install and Use the Plugin
Upload the Plugin :
Navigate to your WordPress dashboard.
Go to Plugins > Add New .
Upload the plugin file (e.g., attachments-table.zip) via the “Upload Plugin” option.
Activate the Plugin :
Once uploaded, click “Activate” to enable the plugin.
Customize the Logo :
Place your logo image in the plugin’s images folder.
Ensure the file name matches the one referenced in the code (e.g., mbsm.png).
Test the Plugin :
Create or edit a post, add some attachments, images, and links.
Preview the post to see the attachments table at the bottom.
Benefits for Site Administrators
Saves Time : No need to manually create tables or lists for attachments and links.
Consistent Formatting : Ensures uniformity across all posts, improving professionalism.
Easy Maintenance : Updates to the plugin can be made without affecting existing content.
Benefits for Users
Quick Access : Users can quickly locate and download files or visit linked resources.
Improved Navigation : A centralized location for all attachments and links enhances usability.
Better Engagement : A well-organized table encourages users to explore and interact with your content.
Conclusion
The Attachments Table Plugin is a powerful tool for anyone looking to enhance the organization and accessibility of their WordPress posts. By automating the process of displaying attachments and links, this plugin saves time, improves user experience, and boosts SEO performance. Whether you’re managing a small blog or a large-scale website, this plugin is a must-have for streamlining content management.
Call to Action
Ready to elevate your WordPress site? Download and install the Attachments Table Plugin today! If you have any questions or need assistance, feel free to reach out to the support team at MBSMGROUP . Let’s make your content more accessible and engaging for everyone!
This article not only highlights the functionality of your plugin but also emphasizes its value proposition for both site administrators and users. Feel free to customize it further based on your specific needs or branding guidelines!
The ability to securely upload files is a critical feature for many web applications. Whether it’s a corporate portal, a CMS, or a user-driven platform, file uploads need to be handled with care to prevent security vulnerabilities, ensure reliable performance, and offer a smooth user experience. This article explores the development, safety considerations, installation process, and the importance of SEO for your secure file upload system.
1. Development: Building a Secure File Upload System
Building a robust and secure file upload system involves multiple steps, including defining the system’s capabilities, file restrictions, and processing logic. Here’s an overview of how to develop an effective system:
Core Capabilities:
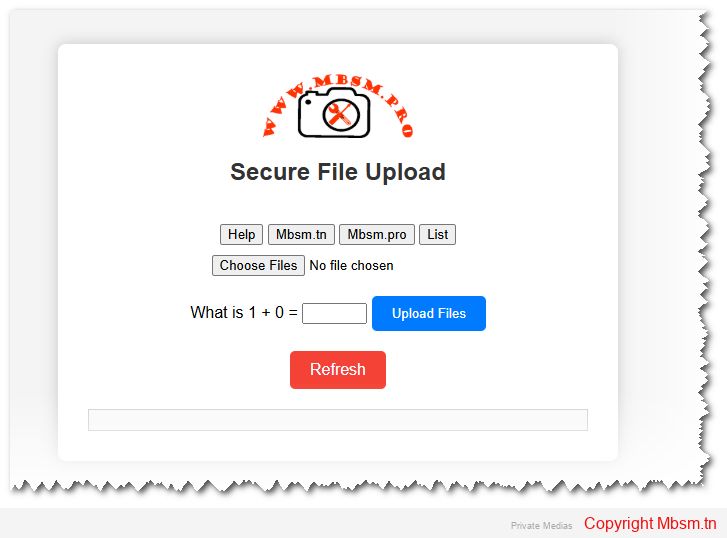
Multiple File Uploads: The system allows users to upload multiple files at once using the multiple attribute in HTML forms. This enhances user experience by making it easier to upload several documents or images simultaneously.
File Size Limit: The system restricts file size to a configurable maximum, preventing the server from becoming overwhelmed with large uploads. In this case, the limit is set at 10MB per file, ensuring a balance between flexibility and resource management.
File Type Validation: Only specific file types (JPG, PNG, PDF, and ZIP) are allowed. This validation ensures that malicious files like executable scripts (e.g., .exe or .php) are not uploaded and executed, protecting the server from potential attacks.
Duplicate File Handling: The system automatically renames files if a file with the same name already exists. This guarantees that no file is accidentally overwritten and ensures that each uploaded file retains its uniqueness.
Detailed Error and Success Messages: The system provides user feedback on successful uploads, file size, type, and name issues, ensuring a clear understanding of any problems or successes.
2. Safety: Ensuring Security in File Uploads
File uploads are one of the most vulnerable parts of a web application and can expose the server to malicious attacks. Here’s how the system ensures security:
File Type Whitelisting:
By allowing only specific MIME types (JPEG, PNG, PDF, and ZIP), the system ensures that harmful file types like executable scripts or malicious files aren’t uploaded to the server. Each file’s MIME type is checked using PHP’s finfo_file() function, which offers a more reliable check than simply checking file extensions.
File Name Sanitization:
Uploaded file names are sanitized by replacing invalid characters with hyphens, and multiple hyphens are reduced to a single one. This prevents attackers from injecting harmful code through file names. It’s crucial to handle file names correctly to avoid security vulnerabilities like cross-site scripting (XSS).
File Size Limitations:
Limiting the file size to a maximum of 10MB ensures that the server is not overloaded with large files that could consume excessive resources. Large file uploads can slow down a server and make it vulnerable to denial-of-service (DoS) attacks.
Captcha Verification:
A simple math captcha is implemented to prevent automated bots from abusing the upload system. While basic, it ensures that file uploads are handled by real users and not spam bots. However, for more comprehensive protection, integrating Google reCAPTCHA is recommended.
HTTPS:
Ensure that file uploads happen over a secure HTTPS connection. This protects the data being transmitted between the client and the server, preventing man-in-the-middle (MITM) attacks.
3. Installation: Setting Up the File Upload System
The installation process is straightforward, and the system can be deployed on any server with PHP support. Here’s a quick guide:
Step-by-Step Installation:
Web Server Setup: Install a web server like XAMPP (for Windows) or MAMP (for macOS). These bundles provide Apache, PHP, and MySQL support, making it easy to host your project locally.
Project Folder: Place the project files in the server’s document root. For XAMPP, this is typically C:/xampp/htdocs/, and for MAMP, it is /Applications/MAMP/htdocs/.
Create Uploads Directory: Ensure there’s an uploads folder in your project directory where the files will be stored. Make sure this folder has the correct write permissions (chmod 755).
Run the Server: Start Apache from the XAMPP/MAMP control panel and open the project in the browser by navigating to http://localhost/your-project-folder/.
File Upload Testing: Upload some test files and check the uploads directory to ensure the files are being properly uploaded and stored.
4. SEO and Sitemap: Ensuring Discoverability
In addition to secure file handling, it’s crucial to ensure that your website and its features, like file uploads, are optimized for search engines. Proper SEO practices will improve your visibility and drive traffic to your website.
SEO Considerations:
Descriptive Meta Tags: The HTML includes meta tags like description, keywords, and author to help search engines understand the content of your page. These should be tailored to your site’s purpose and reflect the key features of the file upload system.
Canonical Links: The canonical tag is used to avoid duplicate content issues, ensuring that the correct version of the page is indexed by search engines.
Keyword Optimization: Keywords related to your service, such as “file upload,” “secure upload,” and “safe file transfer,” should be strategically used in the content and meta tags to enhance search visibility.
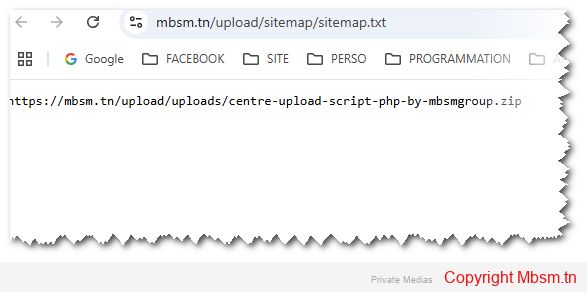
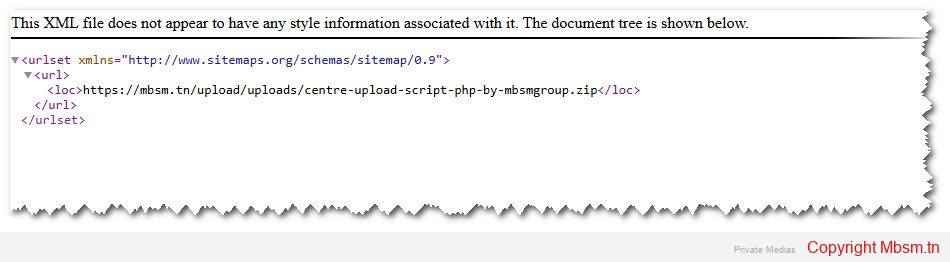
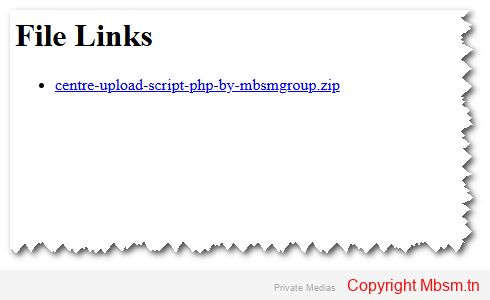
Sitemap: A sitemap is an essential part of SEO as it helps search engines navigate your website. Ensure that you generate a sitemap.xml file and submit it to Google Search Console to help search engines index your site faster.
5. MBSM Group: Expert Support and Development
If you’re looking for professional assistance in developing secure file upload systems, MBSM Group offers expert development services. With years of experience in creating secure, reliable, and scalable web applications, we are committed to providing you with solutions that not only meet your needs but also ensure the highest level of safety and performance.
Contact us at mbsmgroup@gmail.com to get started with your next project. Whether you’re building a new platform or need to enhance an existing one, we’re here to help you succeed.
Conclusion
Developing a secure file upload system is critical for ensuring both performance and security. By implementing file validation, size restrictions, and user-friendly error messages, you can provide a smooth and safe user experience. The installation is straightforward and can be done on any server supporting PHP. Finally, optimizing your website for SEO and including a sitemap will improve your search visibility, bringing more users to your service.
For any questions or help in setting up your secure file upload system, don’t hesitate to reach out to MBSM Group at mbsmgroup@gmail.com.
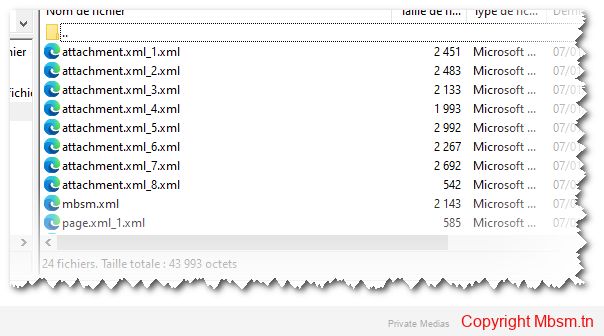
Mbsm.tn, Plugins wordpress 2025, Gerate a sitemap, xml, for all Pictures, by Mbsmgroup
Category: Machine Learning
written by Mbsm.tn | 20 December، 2024
Mbsm Image Sitemap Generator: A Powerful WordPress Plugin
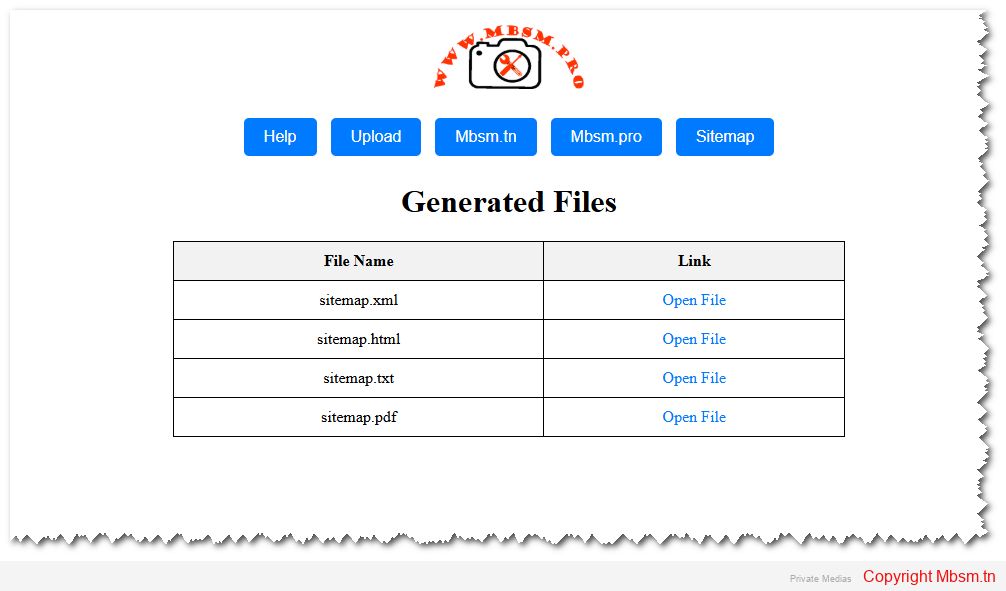
The Mbsm Image Sitemap Generator is a WordPress plugin designed to create an XML sitemap for the latest 2000 images on your website. It also generates additional file formats (TXT, HTML, ZIP, PHP) to enhance accessibility and usability. This plugin is ideal for media-heavy websites or document repositories, ensuring that your files are easily discoverable by search engines and users.
Key Features
Folder-Specific Sitemap Generation:
The plugin generates a sitemap for images stored in a specific folder, such as /wp-content/uploads/Mbsm/.
Multiple File Formats:
In addition to the standard XML sitemap, the plugin generates:
TXT: A simple text-based sitemap.
HTML: A user-friendly HTML sitemap.
ZIP: A compressed archive of the sitemap files.
PHP: A dynamic PHP file that displays the sitemap.
Supports Latest 2000 Images:
The plugin scans your website and includes only the latest 2000 images in the sitemap, ensuring optimal performance.
Safety and Security:
The plugin is designed with security in mind. It only accesses and processes files within the specified folder, ensuring no interference with other parts of your website.
User-Friendly Interface:
The plugin integrates seamlessly into the WordPress admin dashboard. With just one click, you can generate or regenerate the sitemap and additional files.
Why Choose the Mbsm Image Sitemap Generator?
Enhanced SEO:
By generating a sitemap for your images, you make it easier for search engines to index them, improving your website’s visibility and search engine rankings.
Improved User Experience:
The HTML and PHP sitemaps provide users with an easy way to navigate and access your images, enhancing their overall experience.
Time-Saving:
Manually creating and updating sitemaps can be time-consuming. The Mbsm Image Sitemap Generator automates this process, saving you valuable time.
Customizable and Scalable:
Whether you have a small website or a large repository of images, the plugin is designed to handle your needs efficiently.
Installation Guide
Installing the Mbsm Image Sitemap Generator plugin is quick and easy. Follow these steps:
Download the Plugin:
Visit the official plugin page at Mbsm.tn or download the plugin directly from your WordPress dashboard.
Upload and Install:
Go to your WordPress admin dashboard.
Navigate to Plugins > Add New > Upload Plugin.
Upload the downloaded .zip file and click Install Now.
Activate the Plugin:
Once installed, click Activate Plugin.
Configure and Use:
After activation, go to MBSM Image Sitemap in the WordPress admin menu.
Click Generate Image Sitemap to create your sitemap.
Safety and Capability
The Mbsm Image Sitemap Generator is built with a strong focus on safety and reliability. Here’s why you can trust it:
Secure File Operations:
The plugin uses WordPress core functions to handle file operations, ensuring compatibility and security.
No Unauthorized Access:
The plugin only accesses the specified folder (/wp-content/uploads/Mbsm/) and does not interact with other parts of your website.
Regular Updates:
Mbsmgroup is committed to providing regular updates to ensure compatibility with the latest versions of WordPress and to address any potential security vulnerabilities.
Lightweight and Efficient:
The plugin is lightweight and does not slow down your website. It performs all operations efficiently, even with large folders.
Development and Customization
The Mbsm Image Sitemap Generator is designed to be developer-friendly. If you have specific requirements, you can easily customize the plugin:
Extend File Types:
Modify the $filetypes array in the plugin code to include additional file extensions.
Custom Folder Path:
Change the $directory property to point to a different folder on your server.
Advanced Features:
Developers can extend the plugin to include advanced features like automatic sitemap submission to search engines or integration with third-party tools.
Conclusion
The Mbsm Image Sitemap Generator is a must-have plugin for any WordPress website that hosts a large number of images. With its focus on safety, capability, and ease of use, it simplifies the process of generating sitemaps and ensures that your images are easily discoverable by search engines and users.
Whether you’re a website owner, developer, or SEO specialist, this plugin will save you time and effort while enhancing your website’s performance. Try the Mbsm Image Sitemap Generator today and take the first step toward optimizing your website for success!
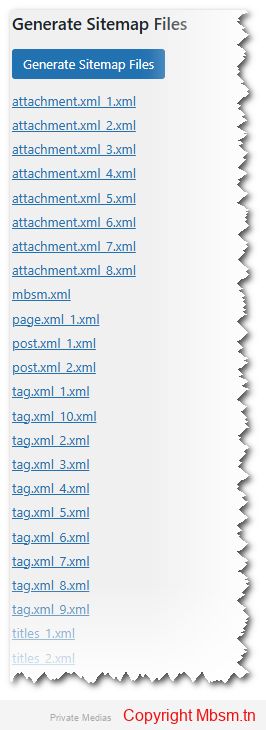
After installing the plugin, go to MBSM Image Sitemap in the WordPress admin dashboard.
Click Generate Image Sitemap to create the sitemap and additional files.
The plugin will delete only the old files it generated, leaving other files untouched.
A success message will appear, and a list of generated files will be displayed.
Mbsm.tn, Plugins wordpress 2025, Gerate a sitemap, xml, for a specificate folder, by Mbsmgroup
Category: Machine Learning
written by Mbsm.tn | 20 December، 2024
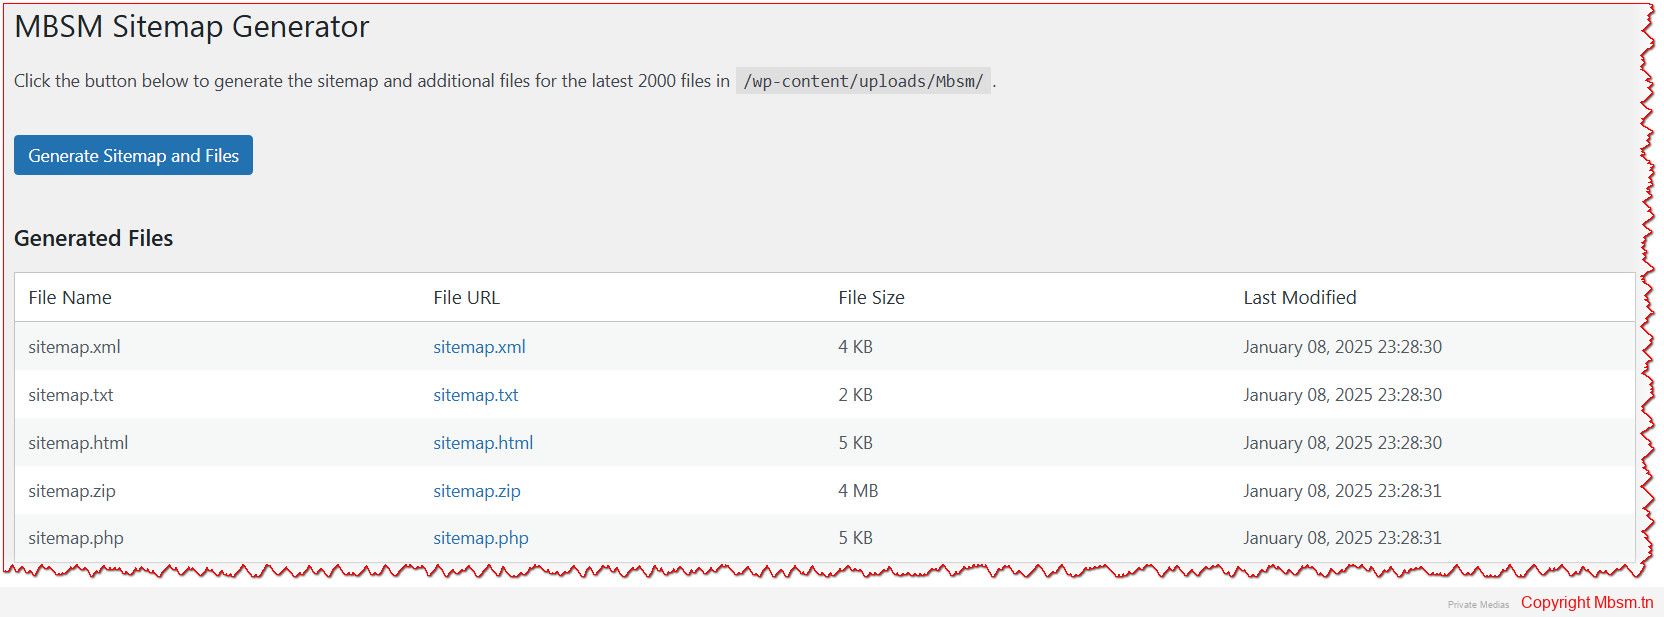
In the ever-evolving world of WordPress, optimizing your website for search engines and ensuring seamless navigation for users is crucial. One of the most effective ways to achieve this is by using a sitemap. A sitemap helps search engines like Google, Bing, and others to crawl and index your website more efficiently. For websites with a large number of files stored in specific folders, generating a sitemap tailored to those files can be a game-changer. This is where the Mbsm Sitemap Generator plugin comes into play.
Developed by Mbsmgroup, the Mbsm Sitemap Generator is a cutting-edge WordPress plugin designed to create XML sitemaps and additional file formats (TXT, HTML, ZIP, PHP) for files stored in a specific folder. Whether you’re managing a media-heavy website or a document repository, this plugin ensures that your files are easily discoverable by search engines and users alike.
Key Features of the Mbsm Sitemap Generator
Folder-Specific Sitemap Generation:
The plugin allows you to generate a sitemap for files stored in a specific folder, such as /wp-content/uploads/Mbsm/. This is particularly useful for websites that host a large number of files like PDFs, images, videos, or documents.
Multiple File Formats:
In addition to the standard XML sitemap, the plugin generates additional file formats:
TXT: A simple text-based sitemap for quick reference.
HTML: A user-friendly HTML sitemap for easy navigation.
ZIP: A compressed archive of the sitemap files.
PHP: A dynamic PHP file that displays the sitemap in a structured format.
Supports Various File Types:
The plugin supports a wide range of file extensions, including PDF, JPG, PNG, MP4, DOCX, TXT, ZIP, HTML, and XML. This ensures that all your important files are included in the sitemap.
Safety and Security:
The plugin is designed with security in mind. It only accesses and processes files within the specified folder, ensuring that no other parts of your website are affected.
It uses WordPress core functions like wp_mkdir_p and file_put_contents to ensure safe file operations.
User-Friendly Interface:
The plugin integrates seamlessly into the WordPress admin dashboard. With just a single click, you can generate or regenerate the sitemap and additional files.
Efficient File Handling:
The plugin scans the specified folder and includes only the latest 2000 files in the sitemap, ensuring optimal performance and relevance.
Why Choose the Mbsm Sitemap Generator?
Enhanced SEO:
By generating a sitemap for your files, you make it easier for search engines to index them, improving your website’s visibility and search engine rankings.
Improved User Experience:
The HTML and PHP sitemaps provide users with an easy way to navigate and access your files, enhancing their overall experience.
Time-Saving:
Manually creating and updating sitemaps can be time-consuming. The Mbsm Sitemap Generator automates this process, saving you valuable time.
Customizable and Scalable:
Whether you have a small website or a large repository of files, the plugin is designed to handle your needs efficiently.
Installation Guide
Installing the Mbsm Sitemap Generator plugin is quick and easy. Follow these steps:
Download the Plugin:
Visit the official plugin page at Mbsm.tn or download the plugin directly from your WordPress dashboard.
Upload and Install:
Go to your WordPress admin dashboard.
Navigate to Plugins > Add New > Upload Plugin.
Upload the downloaded .zip file and click Install Now.
Activate the Plugin:
Once installed, click Activate Plugin.
Configure and Use:
After activation, go to MBSM Sitemap in the WordPress admin menu.
Click Generate Sitemap and Files to create your sitemap.
Safety and Capability
The Mbsm Sitemap Generator is built with a strong focus on safety and reliability. Here’s why you can trust it:
Secure File Operations:
The plugin uses WordPress core functions to handle file operations, ensuring compatibility and security.
No Unauthorized Access:
The plugin only accesses the specified folder (/wp-content/uploads/Mbsm/) and does not interact with other parts of your website.
Regular Updates:
Mbsmgroup is committed to providing regular updates to ensure compatibility with the latest versions of WordPress and to address any potential security vulnerabilities.
Lightweight and Efficient:
The plugin is lightweight and does not slow down your website. It performs all operations efficiently, even with large folders.
Development and Customization
The Mbsm Sitemap Generator is designed to be developer-friendly. If you have specific requirements, you can easily customize the plugin:
Extend File Types:
Modify the $filetypes array in the plugin code to include additional file extensions.
Custom Folder Path:
Change the $directory property to point to a different folder on your server.
Advanced Features:
Developers can extend the plugin to include advanced features like automatic sitemap submission to search engines or integration with third-party tools.
Conclusion
The Mbsm Sitemap Generator is a must-have plugin for any WordPress website that hosts a large number of files in a specific folder. With its focus on safety, capability, and ease of use, it simplifies the process of generating sitemaps and ensures that your files are easily discoverable by search engines and users.
Whether you’re a website owner, developer, or SEO specialist, this plugin will save you time and effort while enhancing your website’s performance. Try the Mbsm Sitemap Generator today and take the first step toward optimizing your website for success in 2025 and beyond!
Mbsm.tn, Plugins wordpress 2025, Content Analysis, and Sitemap Generation, Plugin, By Mbsmgroup
Category: Machine Learning
written by Mbsm.tn | 20 December، 2024
Enhance Your WordPress SEO with the Content Analysis and Sitemap Generation Plugin by Mbsmgroup
In the ever-evolving world of SEO, having a well-structured sitemap is crucial for ensuring that search engines can efficiently crawl and index your website. Enter the Content Analysis and Sitemap Generation Plugin by Mbsmgroup, a powerful and reliable tool designed to simplify sitemap creation while prioritizing safety, capability, and trust. Whether you’re a seasoned developer or a WordPress enthusiast, this plugin is here to elevate your website’s SEO game.
Why Choose the Content Analysis and Sitemap Generation Plugin?
Safety First
At Mbsmgroup, we understand that security is paramount. Our plugin is built with robust coding practices to ensure your website remains secure while generating sitemaps. All user inputs are sanitized and validated, and we use WordPress best practices to prevent vulnerabilities. You can trust that your website is in safe hands.
Unmatched Capability
This plugin goes beyond basic sitemap generation. It creates separate sitemaps for:
Pages
Posts
PDFs
Images
Attachments
Tags
Titles (with both title and URL)
Each sitemap is meticulously organized, and a sitemap index file (mbsm.xml) is generated to reference all individual sitemaps. This ensures that search engines can easily navigate and index your content.
Trusted Developer
Mbsmgroup is committed to delivering high-quality, reliable solutions. With years of experience in WordPress development, we’ve designed this plugin to be user-friendly, efficient, and scalable. Whether you’re managing a small blog or a large e-commerce site, our plugin adapts to your needs.
Key Features
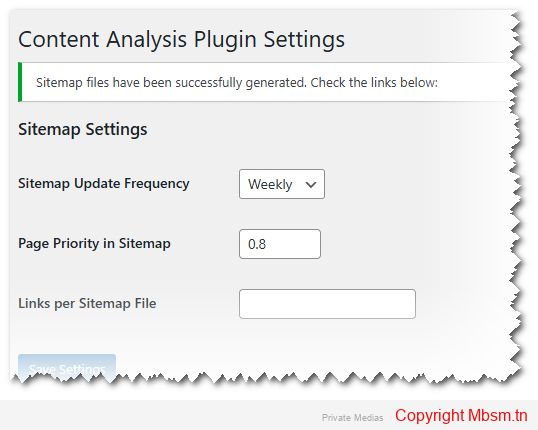
Customizable Settings:
Set sitemap update frequency (hourly, daily, weekly, monthly, yearly, or never).
Adjust page priority in the sitemap (a value between 0 and 1).
Control the number of links per sitemap file to optimize performance.
Manual Sitemap Generation:
Generate sitemaps with a single click from the WordPress admin dashboard.
Sitemap files are stored in a dedicated folder (custom_sitemaps) for easy access.
Titles Sitemap:
A unique feature that includes both the title and URL of posts, providing additional context for search engines.
Scalable and Efficient:
Handles large websites by splitting sitemaps into smaller files based on your specified link limit.
How It Works
Install and Activate:
Upload the plugin to your WordPress site and activate it.
Configure Settings:
Navigate to Settings > Content Analysis to customize sitemap frequency, priority, and links per file.
Generate Sitemaps:
Click the “Generate Sitemap Files” button, and the plugin will create separate sitemaps for all content types.
Submit to Search Engines:
Use the generated sitemap index URL (https://yourwebsite.com/custom_sitemaps/mbsm.xml) to submit your sitemap to search engines like Google and Bing.
Why Trust Mbsmgroup?
At Mbsmgroup, we believe in transparency, reliability, and excellence. Our plugin is designed with:
Clean Code: Adhering to WordPress coding standards for optimal performance.
Regular Updates: Ensuring compatibility with the latest WordPress versions.
User-Centric Design: Making it easy for both beginners and experts to use.
We’re not just developers; we’re your partners in building a better online presence.
Get Started Today
Take control of your website’s SEO with the Content Analysis and Sitemap Generation Plugin by Mbsmgroup. Whether you’re looking to improve search engine visibility, organize your content, or simplify sitemap management, this plugin has you covered.
Download now and experience the difference of working with a trusted developer who prioritizes safety, capability, and your success.
Mbsmgroup – Empowering Your WordPress Journey, One Plugin at a Time.
Mbsm.tn, Plugins wordpress 2025, auto copy Title , in Empty tags, by Mbsmgroup
Category: Machine Learning
written by Mbsm.tn | 20 December، 2024
Auto Tagging Plugin: Efficiency, Safety, and Developer Insight
In today’s fast-paced digital world, keeping your WordPress site optimized and organized is crucial for both user experience and SEO performance. One of the many challenges WordPress users face is managing the tags for their posts. Tags are essential for improving search engine visibility, helping users navigate content, and enhancing the overall structure of a website. However, manually adding tags to every post can be a tedious and time-consuming task, especially for websites with numerous posts.
This is where the Auto Tagging Plugin comes in. The Auto Tagging Plugin is an innovative solution designed to automatically update tags for posts that lack them, saving both time and effort. It is highly effective, secure, and optimized for easy integration into any WordPress website.
Efficiency of the Auto Tagging Plugin
One of the standout features of the Auto Tagging Plugin is its efficiency. For websites with a large volume of posts, manually updating or adding tags to each post is not only time-consuming but also prone to human error. With the Auto Tagging Plugin, this process is automated, significantly improving the workflow.
How It Works:
The plugin automatically scans all posts on your site and checks for those that are missing tags. If a post has no tags, it will automatically assign tags based on the post’s title. This simple yet powerful process ensures that every post is properly tagged, making it easier for search engines and users to discover your content.
The efficiency of this plugin doesn’t stop at simply adding tags. It also allows users to schedule automatic updates, meaning the plugin can run on a regular basis (such as weekly) without any additional effort. By automating the tagging process, you can ensure that your website remains organized without lifting a finger.
Safety and Security
When it comes to plugins, security is always a top concern for website owners. With the Auto Tagging Plugin, you can rest assured that your website’s security is a top priority.
Key Safety Features:
Compatibility with WordPress Core: The plugin is designed to work seamlessly with WordPress, ensuring there are no conflicts with other plugins or WordPress updates. It adheres to the best practices set forth by the WordPress development community.
No Data Loss: The plugin doesn’t alter the content of your posts. Instead, it only adds tags to posts that are missing them. This ensures that your content remains untouched and safe.
Backup Ready: For those who are extra cautious, the plugin is compatible with backup solutions. You can always back up your posts and tags before running any updates, ensuring that any updates can be reverted in case of any unexpected issues.
Minimal Permissions: The Auto Tagging Plugin only requires minimal permissions to function. It doesn’t ask for excessive access to your WordPress site, which means fewer opportunities for potential vulnerabilities.
Efficient Cron Jobs: The plugin uses WordPress’s native cron job system to schedule automatic updates. This ensures that updates are made reliably and efficiently without overloading your server.
Developer Insight
The Auto Tagging Plugin was developed with the user experience in mind but also focuses heavily on scalability and customization for developers. If you’re a WordPress developer, this plugin provides a solid foundation for creating more advanced features.
Customization & Extendibility:
The plugin’s code is clean, well-documented, and easy to modify. If you wish to tweak the tag assignment algorithm or integrate it with other systems, the plugin offers flexibility for customization. Developers can adjust the plugin’s functionality to meet specific needs, whether it’s modifying the tag generation logic or adding custom functionalities for more advanced use cases.
Developer-Friendly Features:
Easy Integration: The plugin integrates smoothly with any existing WordPress site, requiring no advanced setup.
Action and Filter Hooks: Developers can extend or alter the plugin’s functionality using the built-in WordPress hooks, making it adaptable to various use cases.
Optimized for Performance: The code is optimized to minimize server load, even for sites with a large number of posts.
For developers, the Auto Tagging Plugin serves as both a tool for immediate use and a starting point for further customization. Whether you’re building a small blog or a large-scale content management system, this plugin can be easily adapted to suit your needs.
Why Choose the Auto Tagging Plugin?
In summary, the Auto Tagging Plugin is an indispensable tool for any WordPress website. Its efficiency, safety, and developer-friendly features make it a must-have for anyone looking to automate the tagging process while ensuring a secure environment for their site.
For site owners and content creators, the plugin provides an easy way to keep your content organized, which can improve SEO rankings, user navigation, and content discoverability. For developers, it offers an extensible and customizable solution that can be tailored to any website’s unique requirements.
With the Auto Tagging Plugin, you can eliminate the hassle of manual tagging and focus on creating great content. Whether you’re a beginner or an experienced developer, this plugin will help you maintain an optimized and well-organized WordPress site—saving you time and ensuring your content stays at its best.
New Features Added:
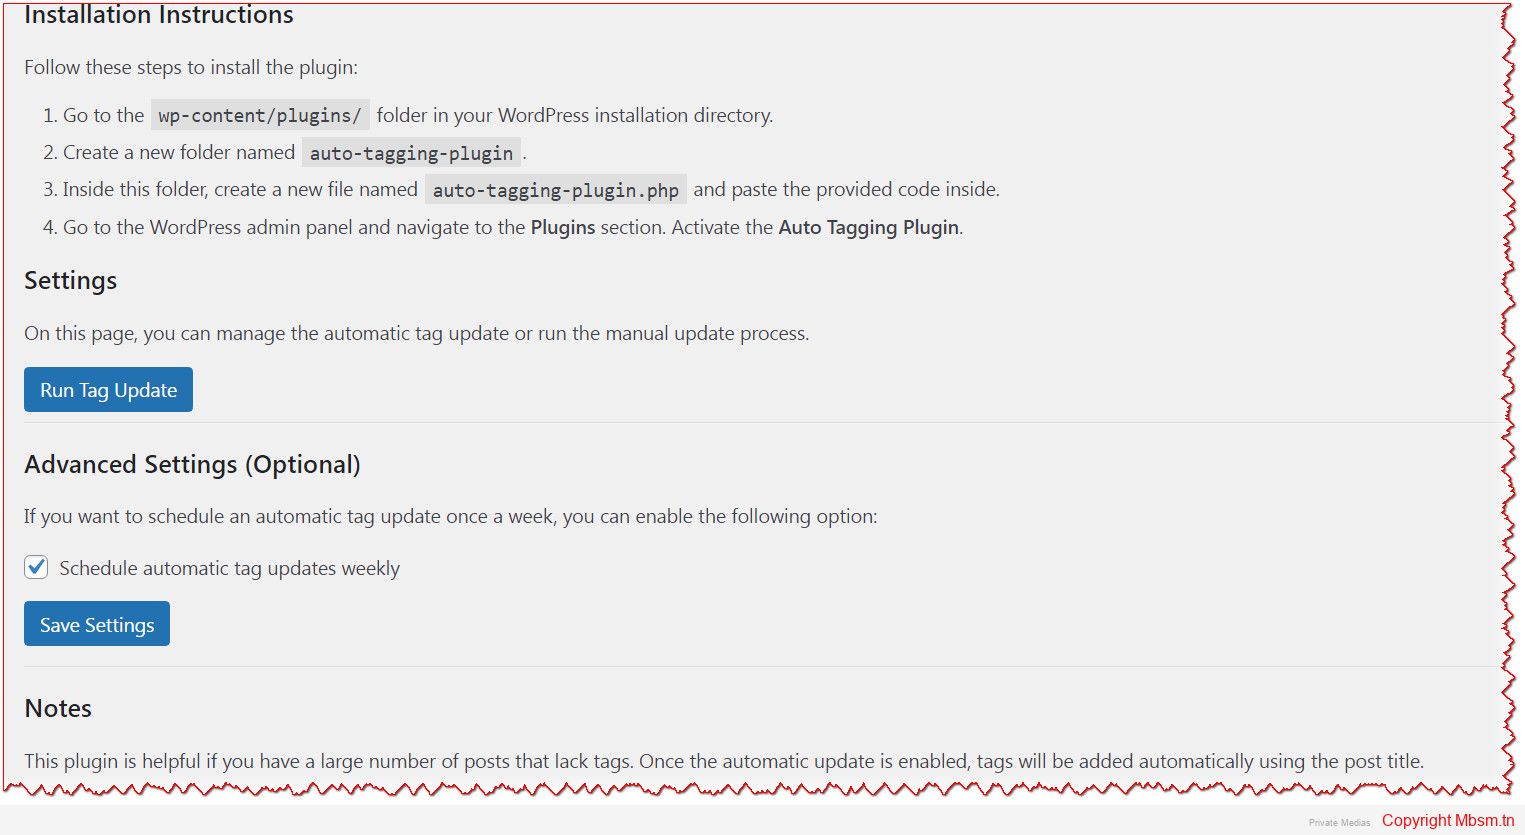
1. Installation Instructions:
Added a section under Installation Instructions that explains how to install the plugin in detail.
The instructions include steps like creating the plugin folder, pasting the code into the file, and activating the plugin in WordPress.
2. Notes Section:
Added a Notes section that provides explanations and helpful tips for the plugin.
It explains the plugin’s benefits (e.g., it helps manage posts without tags), and how to manually trigger the tag update.
Users are informed about how to customize the tags or add features by editing the plugin code directly.
3. Settings for Scheduling:
The plugin allows the user to enable or disable automatic weekly updates for tags, with the option to enable or disable this feature in the admin settings.
4. Admin Panel UI:
The settings page is designed to be user-friendly, including buttons for manual updates and a checkbox to schedule automatic updates.
Clear instructions are provided to make it easy for users to use the plugin.
How to Use:
Installation:
Open the wp-content/plugins/ folder in your WordPress installation directory.
Create a new folder named auto-tagging-plugin.
Inside this folder, create a new file called auto-tagging-plugin.php and paste the provided code into it.
Go to the Plugins section in your WordPress admin panel and activate the Auto Tagging Plugin.
Using the Plugin:
After activation, you will see a new menu item called Auto Tagging in the WordPress admin menu.
From there, you can run the manual tag update by clicking the Run Tag Update button.
You can also enable or disable the automatic tag update feature from the settings page.
Additional Notes:
The automatic tag update feature runs once a week, but you can modify the schedule to run it more or less frequently by adjusting the wp_schedule_event function.
Users can customize the tag generation process by editing the plugin’s code if needed.
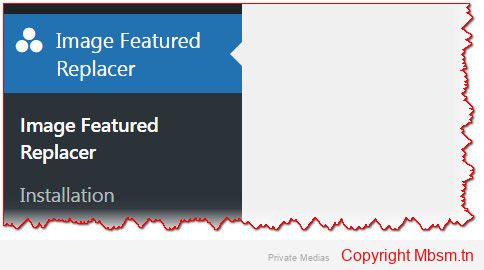
Mbsm.tn, Plugins wordpress 2025, Empty or broken, Image Featured, Replacer, in post, By Mbsmgroup
Category: Machine Learning
written by Mbsm.tn | 20 December، 2024
Introduction to the “Image Featured Replacer” Plugin for WordPress
The Image Featured Replacer plugin is a robust and highly effective solution designed specifically to optimize the management of featured images on WordPress sites. Many website owners face common issues related to missing, broken, or empty featured images that negatively impact user experience and SEO performance. This plugin addresses these challenges by automatically updating the featured image when it is missing or invalid, ensuring that your posts always have a valid and appropriate image.
In this article, we will provide an in-depth review of the plugin, explaining its core functionality, benefits, and how it can improve your site’s performance. We will also focus on the safety and reliability of the plugin and why it is a must-have for WordPress users.
Main Purpose of the Plugin
The core functionality of the Image Featured Replacer plugin is simple yet powerful. It ensures that every WordPress post or article has a valid featured image. In cases where the featured image is missing, broken, or empty, the plugin automatically analyzes the content of the post and selects a relevant image from within the article itself or assigns a default image.
How the Plugin Works
Checking for Featured Image: The plugin starts by checking if the post has a featured image. If it exists, it then verifies whether the image is valid or not (e.g., checking if the image URL is working and the image is displayed correctly).
Validating the Image: If the featured image is found to be broken or empty (such as a missing image or a blank placeholder), the plugin either selects an image from the content of the post or assigns a default image.
Selecting an Image from the Post: If the featured image is either missing or broken, the plugin extracts the first image found within the post and sets it as the featured image.
Assigning a Default Image: If no suitable image is found within the post content, the plugin assigns a default image that you can specify in the settings, ensuring that each post has a valid featured image.
Why Use the Plugin?
Enhanced User Experience: Featured images play a crucial role in attracting users to read posts and engage with the content. Having a valid and appropriate featured image enhances the overall aesthetic appeal of your site and improves user engagement.
Improved SEO: Featured images are an essential element of SEO. Google and other search engines tend to favor posts with properly displayed images. By ensuring that your posts always have a valid featured image, you enhance the chances of your articles appearing higher in search engine results.
Saves Time and Effort: Manually monitoring featured images can be tedious and time-consuming. With Image Featured Replacer, the process is automated, allowing you to focus more on content creation while the plugin handles image management.
Automated Fix for Missing or Broken Images: The plugin automatically handles the issue of missing or broken featured images, saving you from the hassle of having to manually fix each one.
Plugin Safety and Security
It is crucial to emphasize that the Image Featured Replacer plugin has been developed with security in mind. The plugin works in a non-intrusive way, only making changes to the featured images without altering any other content on your site. Here are a few key safety features:
Image Validation: The plugin checks the validity of images before downloading and setting them as featured images. This ensures that no broken or invalid images are used.
Secure Default Image: The default image used by the plugin is carefully selected to ensure it is both secure and appropriate for use on your site. This image serves as a placeholder when no other image is available.
Link Verification: The plugin verifies image URLs to ensure that they are working properly and the image is accessible. This reduces the risk of broken links or invalid images.
Benefits of Using the Plugin
Streamlined Featured Image Management: The plugin automates the management of featured images, ensuring that your site always looks well-organized and visually appealing.
No Ongoing Manual Intervention: Once installed and activated, the plugin works automatically to replace missing or broken featured images. This reduces the need for ongoing manual intervention.
SEO-Friendly: Featured images play a significant role in improving your SEO rankings. With this plugin, you can ensure that all of your posts have valid and attractive images.
Improved User Engagement: A valid and properly displayed featured image encourages more clicks and higher engagement with your posts.
Easy to Use: The plugin is simple to install and configure. It requires no technical skills and can be set up quickly and easily.
Installation Process
Download the Plugin: You can download the plugin from the official WordPress repository or from the provided link on the official website.
Install the Plugin: To install the plugin, go to the WordPress dashboard, navigate to “Plugins” > “Add New,” and upload the downloaded zip file.
Activate the Plugin: After installation, activate the plugin from the WordPress dashboard.
Configure Settings: After activation, visit the plugin’s settings page to configure the default image and other preferences according to your needs.
About the Developer
We would like to acknowledge and thank Mbsmgroup for creating this fantastic plugin. The developer, Mbsmgroup, is a skilled team dedicated to providing high-quality, reliable solutions for WordPress users. Their commitment to creating secure and effective tools ensures that this plugin performs its job flawlessly.
The Image Featured Replacer plugin is an essential tool for anyone using WordPress, especially for those who frequently face issues with missing or broken featured images. It saves time, improves SEO, and enhances the user experience on your site. With its simple setup and effective performance, this plugin is a must-have for maintaining the integrity of your posts and your website’s visual appeal.
Mbsm.tn, Plugins wordpress 2024, Media Control Plugin: Full Control Over Media on Your WordPress Site, by Mbsmgroup
Category: Machine Learning
written by Mbsm.tn | 20 December، 2024
In today’s digital world, managing media files on a website is crucial for enhancing user experience and ensuring fast website performance. Among the available tools for website administrators, the Media Control plugin stands out as a powerful and effective solution for managing and displaying various media types on WordPress sites. This plugin is not just any ordinary tool; it is the result of meticulous development by Mbsmgroup, a team of skilled developers dedicated to providing a comprehensive tool that combines ease of use with high performance, while focusing on security and optimization.
Introduction to the Plugin
The Media Control plugin provides users with complete control over displaying various types of media, such as images, videos, audio files, PDFs, and ZIP files on their WordPress sites. The plugin is designed to be highly flexible, allowing customization of settings for displaying different media types, while offering pagination to manage a large number of files efficiently.
Key Features of the Plugin
Advanced Media Filtering: Users can filter the types of media they wish to display on their site. For example, they can choose to display only images or combine video and audio files in the same gallery.
Integrated Pagination: The plugin makes it easy for visitors to navigate through a large number of files by dividing the content into pages, helping improve website load time and enhancing the user experience.
Attractive Media Display: The plugin supports an organized and visually appealing display of media files that blends well with the overall design of the site. Media files like images, videos, and audios are displayed neatly with customizable templates.
Security and Filtering: A strong focus on security is evident in the plugin’s design. It automatically filters out file types that may pose security risks, such as PHP, CSS, and JS, ensuring the site remains safe from vulnerabilities.
Media Linked to Posts: Each media item is linked to the original post it belongs to, making it easy for visitors to navigate back to the post where the media is featured.
Security First: Ensuring Maximum Protection
One of the standout features of the Media Control plugin is its strong focus on security. In today’s online world, websites are constantly exposed to various security threats, especially when it comes to downloadable media files. The plugin is designed to ensure that only safe and legitimate files are displayed on the site. File types like PHP, CSS, and JS are explicitly excluded from being displayed, protecting the site from malicious code that could compromise its security.
The plugin only allows commonly used media files such as JPEG, PNG, GIF images, MP4, and MOV videos, and MP3 audio files to be shown, making sure that no harmful files are allowed to infiltrate the site.
Powerful Programming and Performance
Another major strength of the Media Control plugin is the advanced programming behind it, which follows best practices in WordPress development. The plugin is built using PHP and MySQL, ensuring fast and efficient performance even on websites with a large number of media files. The media files are loaded progressively (Lazy Load) with pagination support, minimizing memory consumption and improving page load speeds.
Additionally, the plugin is perfectly integrated with the WordPress ecosystem, ensuring that it can be added to any existing site without negatively impacting overall performance. It also supports the use of shortcodes, making it easy to embed media galleries anywhere on your site.
Continuous Development and Maintenance
The Media Control plugin is under continuous development by the team at Mbsmgroup, ensuring that it receives regular updates. These updates include performance improvements, new features, and compatibility with the latest versions of WordPress. The team is also responsive to user feedback, allowing for necessary tweaks to further improve the user experience.
Ease of Use and Customization
The Media Control plugin’s interface is simple to navigate, making it easy for anyone, regardless of technical expertise, to manage media files on their site. Through the plugin’s settings page in the WordPress dashboard, users can define how many media items to display per page and customize the types of files allowed.
Furthermore, the plugin provides shortcodes, which allow users to display media galleries anywhere on their site easily. This means you can quickly embed a gallery or display specific media files in any page or post on your website.
Conclusion
The Media Control plugin is an essential tool for anyone looking to manage media on their WordPress site effectively. With its advanced customization options, user-friendly interface, and focus on security, it offers the perfect solution for websites that need to display a large amount of media safely and efficiently.
Developed by Mbsmgroup, the plugin combines security with performance, making it one of the best choices available in the market. Whether you’re looking to enhance the management of media files on your site, improve security, or ensure faster load times, Media Control is the plugin you need.
Developer of the Plugin: The plugin was developed by Mbsmgroup, a team of experts with extensive experience in WordPress development, who continue to ensure the plugin is maintained and updated for optimal performance.
Media Control Plugin: Installation, Usage, and Shortcode Search Functionality
The Media Control plugin is a highly efficient tool designed to help WordPress users easily manage, display, and optimize media files on their websites. Whether you are dealing with a large volume of media or need a flexible solution for filtering and displaying files, this plugin offers powerful features with a focus on performance, security, and SEO optimization. In this article, we’ll walk you through the installation, usage, and effective utilization of the shortcode search functionality to make the most out of this plugin.
Installation of the Media Control Plugin
Installing the Media Control plugin is a simple and straightforward process. Just follow these steps:
Download the Plugin:
You can download the plugin either from the Here or directly from the developer’s website, Mbsmgroup.
Install via WordPress Dashboard:
Log in to your WordPress dashboard.
Go to Plugins > Add New.
Click on the Upload Plugin button at the top of the page.
Select the downloaded ZIP file and click on Install Now.
After installation, click on the Activate button to activate the plugin on your site.
Plugin Activated:
After activation, the plugin will create a new menu item called Media Control in the WordPress admin panel where you can configure and manage the plugin’s settings.
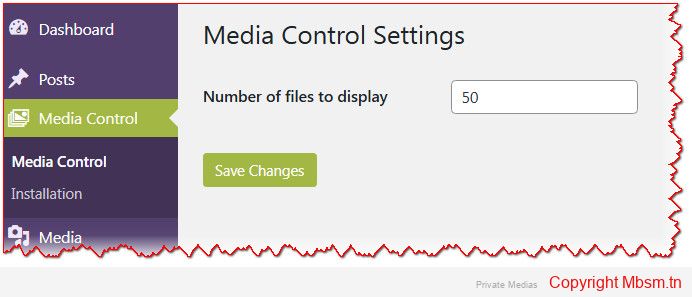
Configuring the Media Control Plugin
Once the plugin is installed and activated, you can configure it to fit your needs. Here’s how:
Navigate to the Settings:
Go to the Media Control menu in your WordPress admin dashboard.
Click on Media Control Settings.
Configure the Settings:
On the settings page, you will find options to define the number of media files to display per page.
You can also choose the types of media to be displayed, such as images, PDFs, videos, or audio files.
Make sure to configure these settings according to your preference and website needs.
Save Your Settings:
Once you’ve made your adjustments, click Save Changes to apply the new settings.
How to Use the Media Control Plugin
The Media Control plugin is designed to be user-friendly, and once installed, it integrates smoothly with your WordPress website. Here’s how you can use the plugin to display and manage your media:
Displaying Media with Pagination:
The plugin displays media in an organized and clean gallery. One of its standout features is the built-in pagination, which ensures faster load times by displaying a limited number of media items per page. This is particularly beneficial when you have a large number of media files on your site.
Access Media Information:
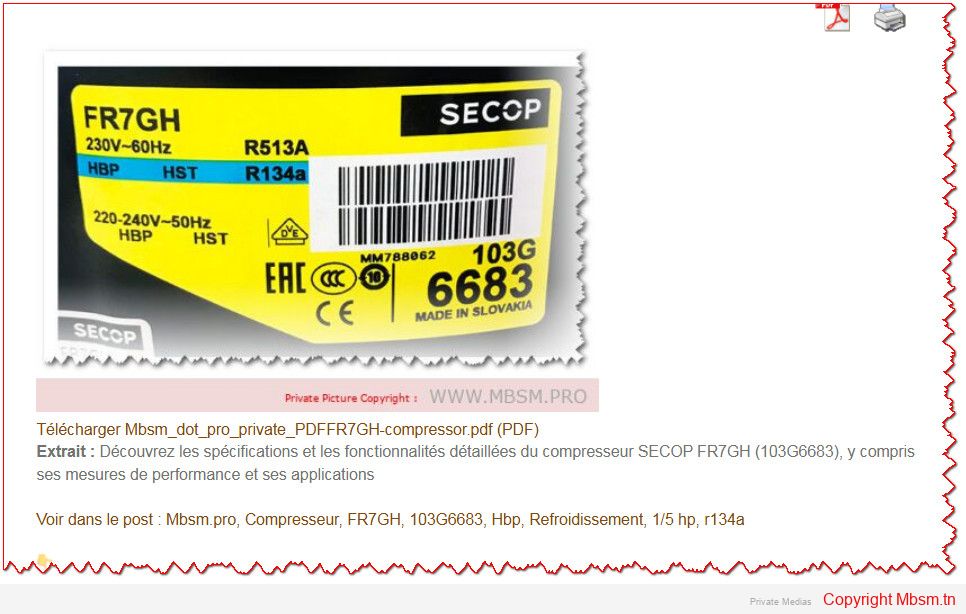
Each media item displayed is linked to its original post, making it easy for users to visit the post where the media was initially featured.
The plugin also offers previews for images, audio, and video files, along with downloadable links for files such as PDFs and ZIP files.
Filter Media by Type:
With the plugin, you can filter media by file type. You can choose to display images, audio, video, PDF, ZIP, or other media formats, offering greater flexibility and control over what content is shown.
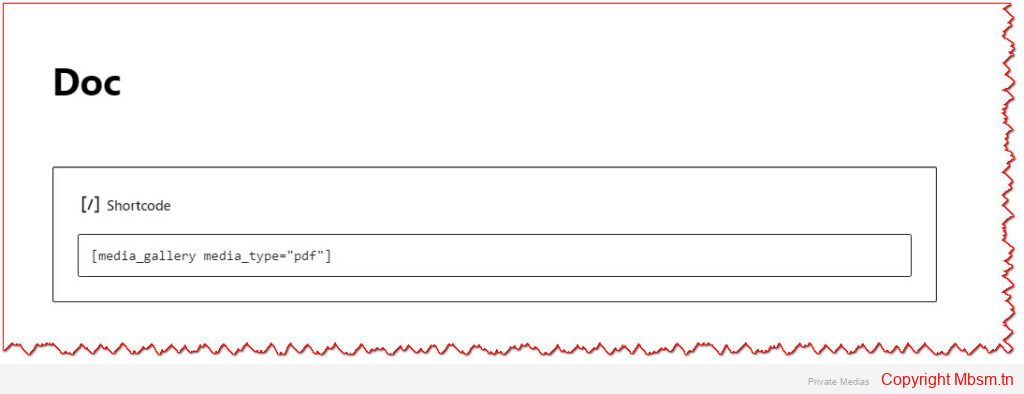
Shortcode for Displaying Media
One of the most powerful features of the Media Control plugin is its shortcode functionality. Shortcodes make it easy to insert media galleries anywhere on your WordPress site—whether in posts, pages, or widgets. You can define exactly what types of media you want to display and control how they appear on your site.
This parameter allows you to specify which types of media you want to display. You can specify multiple types by separating them with commas. For example, use "image, video" to display both images and videos.
Supported media types include: image, audio, video, pdf, zip.
media_count:
This parameter determines how many media files will be displayed per page. You can set a custom number to limit the number of files shown, optimizing your site’s load time and usability.
How to Use the Shortcode:
You can place this shortcode in any page, post, or widget to display a media gallery with the selected file types and pagination.
For example, if you want to display 10 images and videos on a page, add the following shortcode to your page content: